A fly landed in the middle of my third coat of paint yesterday and you can see the roller mark where I had to pick the fly off and re-roll that area. A fly may have ruined it for everybody!! Or at least may mean that I have to re-paint the top. I am hoping that the light in the office will not draw attention to the flaw and that it will disappear once I load my desk up with office type things.
Anyways, enough of the fly. The desk is in the office and ready for use! You ready for this before and after?


Sorry for the terrible after. I couldn't put the legs on until it was inside and I didn't have room for a really far panned out picture.
Anyways, here's how it all went down.
Step 1: Have a garage or borrow one. Or steal one. Garages are amazing! I love having a garage so much! The apartment was not the ideal crafting space. It typically meant the living room was a minefield of scissors, staple guns, hot glue, and wet paint. Since the project was a bit smelly it was so awesome to be able to spread everything out for miles and let things dry over night. Here's what it looked like for the past week, Crosby included. She stood or lied right there whenever I was out there and made sure those neighborhood kids didn't come bother me. JK...I like the neighbor kids...they are hilarious.

Step 2: Primer
I used oil based primer and paint because I read that it dried harder than latex paint making it more durable. I thought this was a good feature for the desk. That being said, oil based paint is a bear to work with! It doesn't wash out and cleaning your brushes is a pain. Here it is after one coat of primer.

Step 3: Paint
And here's coat one of paint. I used a foam roller as much as I could and then a small paint brush for the nooks and crannies. Everywhere I used the paint brush I went back over with a foam roller as much as possible to get an even look. I primed and painted coat one on the first day and then let each coat of paint dry for a full night before applying the next coat. It took 3 coats to completely cover and lose the streakiness.

Step 4: Decorate your driveway
More accurately, have your dog get distracted by the pesky CPI security lady, step in your pan of paint, and proceed to leave footprint on your driveway. True story. Later I found her sucking on her foot so I ended up cutting all the hair off her foot for fear she would be poisoned to death.

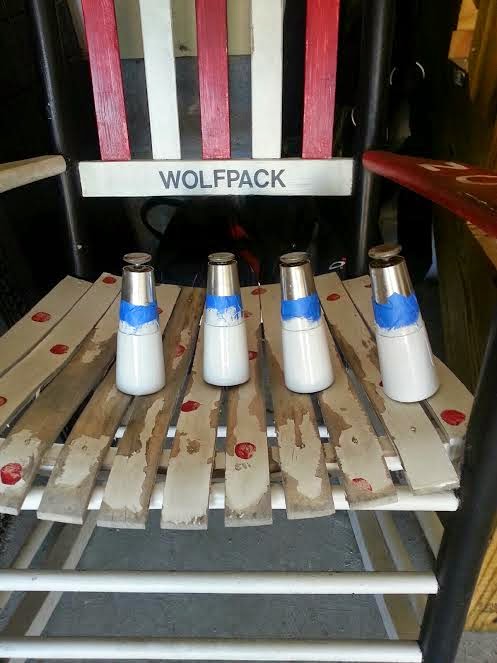
Step 5: Spray paint
I disassembled the drawer pulls as much as possible and spray painted them a champagne gold color. It's a difficult color to find and not in many hardware stores. Try a craft store like Michael's. I also sprayed the bottom of the feet but I had to give them a coat of white first. They have screws sticking out the bottom of them so I had to get creative with my drying methods. If you don't have an old rocking chair, you could try cutting some holes in some thick cardboard. PS: This rocking chair is getting scraped down and re-done and then probably sold because we don't have room for it. Any takers?
Then you're done! Great job! You only lost 1 week of garage use and 1 layer of skin to scrub the paint off! Get a really strong, handsome man to help you move it into your office and make sure he gives you lots of compliments and tells you it was totally worth blowing off a week of prospecting for :)
Lets ooooo and ahhhh at it again, shall we?

And now the office looks like this!

Such an improvement, eh?!

No comments:
Post a Comment